
Preparing Your Walls
Preparation is one of the most important steps in achieving smooth walls. Before applying any finishing material, make sure the surface is clean, dry, and free of dust or loose debris. Old wallpaper should be removed, and any existing paint should be sanded lightly to create a good surface for adhesion. If your wall has cracks or dents, fill them with joint compound or spackling paste, then sand smooth once dry. For larger imperfections, you may need mesh tape or patch kits to create an even foundation. Take the time to vacuum dust and wipe down surfaces with a damp cloth to ensure nothing interferes with adhesion. A properly prepared wall ensures that your finishing layer applies evenly and looks consistent. Once your wall is ready, you can move on to techniques that deliver a truly modern surface finish.
Using a Concrete Skim Coat
Posts on this site may contain sponsored content, paid link placements, or affiliate links. I may earn a commission or fee if you click a link or purchase through these recommendations at no additional cost to you.
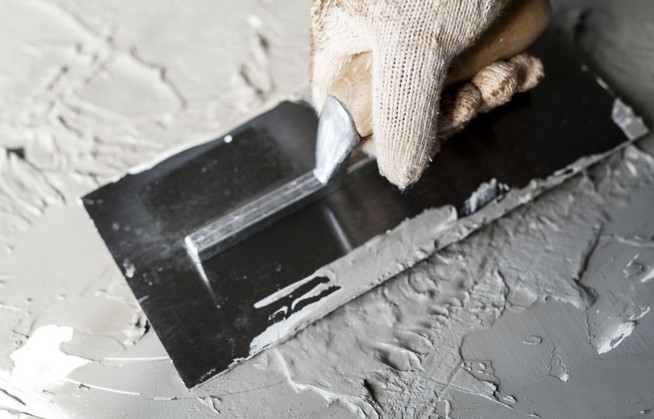
One of the most effective methods to achieve a modern, smooth finish is by applying a concrete skim coat. This technique involves spreading a thin layer of cement-based material across the surface of your walls, creating a sleek, durable finish that can be painted or left in its natural form for an industrial look. Skim coating is especially useful if your walls have imperfections, rough textures, or patchy repairs that are difficult to cover with paint alone. The process requires patience and practice, but the end result is a modern, polished surface that elevates any interior. Skim coats are also versatile: they can be tinted with pigment for a unique design finish or sealed with a protective topcoat for durability in high-traffic areas.
Choosing the Right Tools and Materials
To successfully skim coat your walls, you’ll need the right tools:
- Trowel or wide drywall knife for spreading the skim coat
- Mixing bucket and paddle for preparing the compound
- Sandpaper or sanding sponge for smoothing between layers
- Primer and paint if you want a finished colored surface
- Protective gear such as gloves, goggles, and a mask to protect from dust
When selecting materials, choose high-quality skim coat compounds that are designed for wall application. For beginners, premixed skim coat products can be easier to work with. If you prefer a textured or decorative finish, consider additives or specialty compounds that allow for unique patterns. Using the proper primer before and after the skim coat can also increase adhesion and longevity.
Application Techniques
Skim coating can be done in several layers, depending on the condition of your walls and the finish you want to achieve. Start by applying a thin base coat, using wide, even strokes to cover the entire surface. Allow it to dry completely before lightly sanding to remove imperfections. Repeat the process with one or two additional coats until you reach a smooth finish. Always work in manageable sections, and keep your tools clean to avoid streaks or clumps in the mixture. If you are working on a large room, consider dividing the wall into zones so you can focus on maintaining a consistent texture.
Common mistakes to avoid: Don’t rush drying time between coats, as this can cause cracking or peeling. Avoid applying too thick a layer, which can lead to uneven results and longer drying times. Finally, remember that over-sanding may weaken the surface, so use a light touch and only smooth where necessary. Another frequent error is failing to feather the edges of each pass with the trowel, which can leave visible ridges once the wall is painted.
Finishing Touches
Once your skim coat is dry and smooth, apply a high-quality primer to ensure proper paint adhesion. Then, choose a paint color that complements your interior style. Matte finishes can give a modern, subtle look, while satin or semi-gloss paints add durability and reflect light, making your space feel more open. For an ultra-modern aesthetic, consider pairing smooth walls with neutral colors and minimalist trim. You can also experiment with bold accent walls, using deep shades or textured paints to create focal points without compromising the sleek overall look. Adding molding, baseboards, or wall panels after skim coating can further enhance the sense of sophistication.
Alternative Options
If skim coating feels too advanced, there are alternative ways to achieve smoother walls. You can install drywall over existing surfaces, use textured wallpaper to mask imperfections, or hire a professional painter to handle the process. Each option has pros and cons: drywall offers a brand-new surface but is more labor-intensive, wallpaper can add style but doesn’t provide a truly smooth wall, and professionals save time but increase cost. Other alternatives include using wall liners, which are heavy-duty materials applied under wallpaper to cover flaws, or opting for plaster finishes that create a rustic yet modern texture. However, skim coating remains one of the most cost-effective and visually appealing methods for DIY home renovators.
Extra Tips for DIY Success
- Work in a well-ventilated space to minimize dust inhalation.
- Use drop cloths to protect flooring and furniture.
- Practice skim coating on a small wall or board before tackling large rooms.
- Keep extra compound on hand in case you need touch-ups later.
- Don’t forget proper cleanup: wash tools immediately to prevent hardened compound.
Final Thoughts
Achieving smooth and modern walls requires preparation, patience, and the right technique. A concrete skim coat offers an excellent solution for homeowners who want a sleek, contemporary look that lasts. By taking the time to properly prepare your surfaces, avoid common mistakes, and apply the material correctly, you can transform your walls into a stunning focal point of your home design. Whether you tackle the project yourself or hire a professional, the results can redefine your living space. Smooth walls are more than a background element—they set the stage for your décor, influence the atmosphere of your rooms, and give your home a timeless sense of elegance.
